Wednesday 27 February 2013

Collaborative Brief // Ella's Kitchen

 A collection of information that we wish to communicate to the target audience.


How can Ella’s pouches have a long shelf life + keep their nutritional value?

Our 4 little secrets help us do what we do – create healthy, safe, tasty and long-shelf-life baby food.  Our process helps maintain as many of the nutrients as possible – just like you make at home. What we do is:
  1. Carefully balance our recipes to be sufficiently naturally acidic to be hostile for bugs but safe for babies’ tiny tummies.
  2. Flash-pasteurise the fruit + veg to kill any existing or dormant bugs.
  3. Fill the pouches hot, to ensure the pouches themselves are free from bugs.
  4. Draw a vacuum and add an inert gas into the top of the pouch, before we screw the caps on tightly. This means that there is no oxygen in the pouch to feed anything nasty in there!
 So now you know our secrets!

Organic food is more expensive than non-organic food. Why is it better?

  • We believe it’s better for your little one because…
Organic baby food contains far fewer additives. Among the additives banned by the Soil Association are hydrogenated fat, aspartame (artificial sweetener) and monosodium glutamate.
Organic food comes from carefully monitored sources with high standards in quality, and many people prefer organic food because they say it tastes better – we think your little one will too!
  • We believe it’s better for the environment because…
The UK government has said that organic farming causes lower pollution from sprays, produces less carbon dioxide – the main global warming gas – and less dangerous wastes. Organic foods also avoid Genetically Modified (GM) ingredients and crops.
  • We believe it’s better for animals because…
Organic farmers don’t routinely use antibiotics on their animals and they take the welfare of their animals very seriously under organic standards. The way organic food is produced protects the environment for wildlife, too. The benefits of the organic approach are acknowledged by animal welfare organisations such as Compassion in World Farming, as well as the UK government.


Where do the ingredients in Ella’s Kitchen products come from?

We care a lot about protecting our environment for our little ones in the future, so we try very hard to keep the travel miles of our ingredients to a minimum. However, to source yummy ingredients such as organic mangoes, we have to travel a little farther afield. All our ingredients are of the highest organic and Soil Association standard, with sustainability an important aspect for us.
We source our organic meat from the EU and the majority comes from the UK. Likewise with our products, we make these in the EU, including the UK.

What is good? // Bunting

While researching Bunting I came across some really nice -oops, I mean interesting paper craft and thought that I would document it here to reference back to in the future, most images were found on pinterest (I am obsessed).  Also the paper craft idea could feed into my bunting designs/ stationery/ perhaps 'how to make paper bunting' or even 'paper craft' kits.


The colours used here are amazing, very bold.  Paper craft is very delicate, I'd like to work with this technique at some point.


YOU WILL NEED: 

+ A4 Paper
+ Scissors
+ Ruler
+ Needle (for scoring)
+ Thread
+ Double sided tape/glue
+ Printable templates (all files are at the bottom of the post)


HOW TO 

1. Print the template onto A4 paper. You can make four medallions from each sheet of A4 paper. Cut out.
2. Using a needle, prick holes in the template, where marked.
3. Using a needle and ruler score along all straight lines.
4. Fold the piece of paper up (accordion fold).
5. Cut out the diamond shapes.
6. Cut a length of cotton (I cut about an arms length).
7 & 8. Start threading the cotton through all the holes (apart from the first hole and last hole).
9. Stick one end of the paper to the other end. I used double sided tape but you can also use glue (I would wait for the glue to dry before finishing the rest of the steps).
10. Thread the cotton through the last hole.
11. Pull on the ends of the cotton until they are tight and then press down on the medallion to flatten….be careful at this point as the medallion will spring back up if not held in place.
12. Weight the medallion and tie a double knot in the thread. This part is quite tricky as the knot needs to be tight in order for the medallion to stay flat. If you have someone around who can help you then do ask!
You can of course make bigger medallions. Just make sure that the length of the paper is at least eight times longer than the width.


This I found quite interesting for packaging presents.


Materials
- 1.75 in. circle punch
- 1 in. circle punch
- Button
- Foam dots
- Glue

Instructions
- Punch out one 1.75" circle to use as a base and 30 1" circles for the petals.
- Attach the button with foam dots to the center of the large circle.
- Fold all the small circles in half. Glue them around the button (with the edge of each circle tucked under the button). I creased some all the way and some only slightly which make the latter petals appear more open—giving the flower an uneven look/texture.

This flower is similar to the one in a previous tutorial but the difference is that these petals are standing upright and not on their side.

Tips!
- Leave the center empty (no button) and use green paper to use it as a wreath gift topper!
- This is a perfect project to use up scraps—make it multicolored!
- It can also be a recycling project by using magazine pages.

This tutorial grabbed my eye due to the strong colours

I love this time of year, and I love to decorate.  Especially with red… my favorite color!  I’m always looking for ways to spruce up the joint, so I made my own decorations to welcome in Autumn proper.  These are going to be my plate toppers for Thanksgiving, no doubt.


Let’s make some easy and cool Autumn decor!


You’ll need to start with 8 3inX3in pieces of paper.  You can use as big or as small as you like, as long as it’s square.  I used construction paper in varying colors.


Fold the paper in half length wise then again.


Squash fold flat.  It will look like a triangle.  Do it again to the other side.


Take the edge of the triangle and fold into the middle.  Do this to the other side as well.


Your pieces will look like this when you’re done.


Make seven more and now let’s glue this bad boy together.


Put a dab of glue under the right side flap.


Place the left tab under the right flap.  Do this all the way around the form.


Place the glue under the right side flap on the last piece and carefully insert the left side of the first piece to glue.


FIN
Make as many as you want to decorate your table and plates.  I think I’m going to attach some string to them and make them into a garland.
Happy Crafting!


What is good? // Birthday Card Tutorial

I found this bunting birthday card tutorial online at http://www.littleloveliesbyallison.com/2011/08/tutorial-simple-banner-card.html
The way that it has been photogaphed looks really professional and I'd like to carry this style into my own tutorials that I intend to design.   
Looking for a really simple, super easy card? Here you go: 


Supplies: 

  • kraft cardstock
  • patterned paper (Echo Park - For the Record)
  • sewing machine/white thread
  • adhesive
  • scissors/pencil
To start, cut out your banner pieces. I made one pattern to trace around so that all my banners would be exactly the same. 


I wish I had a banner punch. Anyone know of a good one? It is hard to get perfectly even triangles


I laid out my pieces and made pencil marks to make sure I got them back in the same spot.


I then used a small bit of adhesive to stick the banners down. I did this for two reasons. First, I didn't want the banners to get bent if they were only sewn down at the top. Second, it holds them in place while you are sewing. 


Stitch down your banner and you are done. Wasn't that simple? 


So simple that I made another one.


I left them blank for now. If I need a birthday card, all I need to do is add a sentiment. I could add a 'just because' or 'thank you' stamp if that is what I need.  If I want to send it as is, I can do that to.

What is good? // Stationery

 I found this stationery/invitations on http://www.notonthehighstreet.com/search?utf8=%E2%9C%93&term=bunting&search=find.  The colours reflect the target market and the rounded edges adds a suitable looking finish to the cards.


This image was found on pinterest.  The gift tag idea here I hadn't thought about and this could be part of a stationery pack.  I also like the way the image on the top right has been secured with twine, it has more of a rustic feel.


What is Good? // Crochet Bunting Tutorial

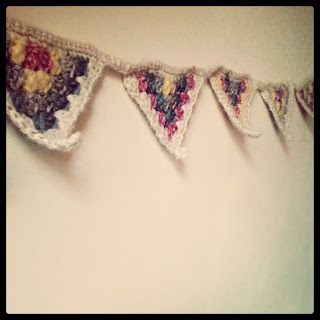
I really like the idea of making bunting out of crochet triangles.  It gives a vintage feel to bunting which is not necessarily modern, but very fashionbale as decorations for homes and shops currently.  The mixture of new and old works really well and has a really homely effect.


Crochet Bunting Tutorial

 http://lisapocklington.blogspot.fr/2012/05/crochet-bunting-tutorial.html 


I have bunting on the brain at the moment; my head is filled with ideas on how to make seriously gorgeous, yet oh-so-easy-peasy garlands of decorative goodness. I'm starting this mini series of bunting how-tos with a tutorial on how to crochet some granny bunting. I use the term granny, as it refers to the style of crochet technique used to make the ubiquitous Granny Square - famous in every 1970s crochet afghan throw. It is a super easy and versatile technique which lends itself just as well to straight rows, chevrons, rounds, hexagons and triangles


This is a great stash busting project as you can make it as multicoloured as you wish, changing colour at the beginning of each row. It works best if you use the same colour yarn for the final round as well as for the top row that joins all the flags together. In this tutorial I will be using the method of creating half a square motif - always handy to get your head around for when you are making blankets or other items that may require halves of your main block to fill in gaps on edges


This pattern is written in UK crochet terminology, so to assist my lovely friends from the US here is a quick translation guide:

sc (single crochet) = ss (slip stitch) in US
dc (double crochet) = sc (single crochet) in US
htr (half treble) = hdc (half double crochet) in US
tr (treble) = dc (double crochet) in US


Get Smitten Crochet Granny Bunting!

Begin by creating a magic ring and work 3ch (represents 1tr), 3tr, 1ch, 4tr into it, fasten off leaving a 5cm / 2" tail

ch3 (represents 1tr), then 3tr into the same stitch, skip 3tr, work (3tr, 1ch, 3tr) into the space, skip 3tr, 4tr into last tr of previous row, fasten off leaving a 5cm / 2" tail

ch3 (represents 1tr), then 3tr into the same stitch, skip 3tr, 3tr into next space, skip 3tr, work (3tr, 1ch, 3tr) into the space, skip 3tr, 3 tr into the next space, 4tr into last tr of previous row, fasten off leaving a 5cm / 2" tail

Repeat this row, working 3tr into the spaces and (3tr, 1ch, 3tr) into the central 1ch space, until you have 4 rows. Don't forget to change colour for each row!


For the final round - remember this looks best if you use the same yarn as the one you will use to join all the granny flags together -  we are going to add a decorative picot to the centre point as follows. ch3 (represents 1tr), then 3tr into the same stitch, (skip 3tr, 3tr into next space) 3 times, skip 3tr, work (3tr, 3ch, sc into the 3rd ch from hook, 5ch, sc into 5th ch from hook, 3ch, sc into the 3rd ch from hook, 3tr) into the 1ch space, (skip 3tr, 3tr into next space) 3 times, 4tr into last tr of previous row, fasten off leaving a 5cm / 2" tail


Repeat the above until you have as many flags as you want for the length of your bunting - I made 8. This is where you can add some variety to your bunting by mixing up the colour order on the rows each time. I used 4 colours to make mine and changed the order they appeared in on each of the 8 flags (but always keeping the final row the same colour for continuity). If you don't like the idea of changing colour too much, why not make each flag in one colour? You could use a bold 2 colour combo for a nautical look, a graded version of one colour for an on trend, ombre effect, or how about a rainbow if you added on another 3 rows to accommodate all 7 colours? I am going to make a red, white and blue version next for the Queen's Jubilee celebrations!


To join your flags together, and using the same yarn as for your final row with the picot detail, start by ch25, and with the back of the flag facing you, insert the hook into the first loop of the 3tr post on your first flag and make a dc (what we are going to do here is work across the top of our flags, using the loops of the trebles that are now lying on their sides). Work 1dc evenly across the length of your flag into each available loop - numbers are not important here, just try to keep it looking evenly spaced. It looks best if you work into a loop rather than simply over the whole treble as it lies on its side, otherwise it can look a bit too holey.

Tip: as you work this row, dc over the coloured ends from all the other rows as you go, it will save you a lot of time darning in the ends later! You can snip them shorter once you have dc'd over them a few times, to make it less bulky


When you reach the end of the first flag, ch6, then join your second flag as above. Continue in this manner until all your flags are joined with a dc across the top and 6ch inbetween. ch26 and turn the work so that the right side of the flags are now facing. dc into 2nd ch from the hook and then continue to dc all the way along the length of your previous row, fasten off and darn in the ends


Voila! Your granny bunting is now ready to adorn your home or garden ~ enjoy!

Ella's Kitchen

While having a browse on Behance I came across these wooden fruit blocks which is similar to mine and Katie's idea for the veg to hang on the tree.  Considering our subject matter our designs will be more child like and will probably use primary colours.


I like the carefully painted detail on these blocks, it is similar to the illustrations for my Feel Good Drinks Project.


Tuesday 26 February 2013

Collaborative Brief // Ella's Kitchen

The Ella's Kitchen website is a great source for information as they provide lots of information about their brand and products to keep parents happy and to ensure that their baby is getting what they need.  http://www.ellaskitchen.co.uk/

Stuff for the senses

At Ella’s Kitchen, our reason for being is to help kids enjoy eating healthy food.
We believe that, just as adults do, babies eat with all of their senses – so it’s not just the texture or taste that’s important. That’s why we make sure all our scrummy, 100% organic baby food appeals to all their senses, with bright, colourful, squeezy packs that we know they love to grab and squish.

The good stuff we do

Hi,
I’m Ella’s mum. It’s really important to all of us here at Ella’s Kitchen that we make our food as good as it can be, but also that we try to be as environmentally + socially responsible as possible. As well as helping little ones grow up big and strong, we want to do our bit to look after the planet they live on and to give something back to kids around the world.
Take a peek at all the good stuff we do and find out more about why we really are good in every sense.


Alison
Ella’s mum x

Consumer Forum
 
We are over the moon to be one of the founding members of the Consumer
Forum, which has been set up by like-minded, entrepreneurial UK companies to
promote and celebrate excellence in customer relations, and the benefits of
building businesses around what the consumer wants. We are working with
other exciting brands and public bodies, sharing our experience from chatting
with mums + dads, and seeking out new ways of creating great customer service
to spread to the wider business community. 

Food Donations
 
Occasionally, we get overexcited and make too many of our delicious
products. Rather than throw these away, we believe that they
should go to vulnerable children who would really benefit from
them. That’s why we’ve teamed up with some people who can help
us get our products to them.
We work with FareShare, who collect and redistribute food to disadvantaged
people in communities around the UK. Every day, an average of 29,000 people
benefit from the service FareShare provides. In 2010, our donations contributed towards 30,120 meals for
vulnerable and disadvantaged people in the community.
We also, from time to time, donate our products to a local charity, Feed the
Children, who send them out to children in need around the world. Some places
where our donations have been sent include the Rajanpur District of Pakistan, to
help following the 2010 flood disaster, while our breadsticks have been enjoyed
by school children in Liberia.. 


Wednesday 20 February 2013

What is good - Bunting // Binding

This style of binding will work well for my good, as it is more hand-crafted than other methods of binding while still looking professional.  


Coptic Stitch Binding